step by step process on how to setup Accelerated Mobile Pages in WordPress.
Video Tutorial
If you don’t like the video or need more instructions, then continue reading.
Setting up Accelerated Mobile Pages or AMP in WordPress
First thing you need to do is install and activate the AMP plugin. For more details, see our step by step guide on how to install a WordPress plugin.
Upon activation, you can head over to Appearance » AMP page to see how your site looks on mobile devices using AMP.
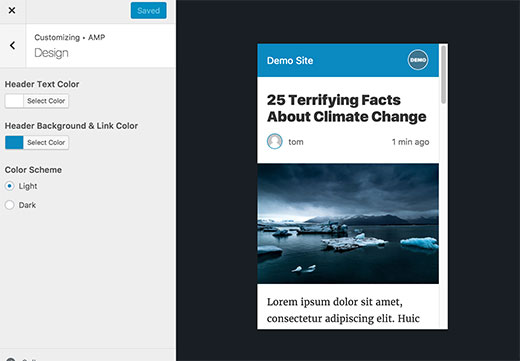
You can change the header background and text color on this page. The header background color you choose will also be used for links.
The plugin will also use your site’s icon or logo if your theme supports it. See our guide on how to add a favicon or site icon in WordPress for detailed instructions.
Don’t forget to click on the save button to store your changes.
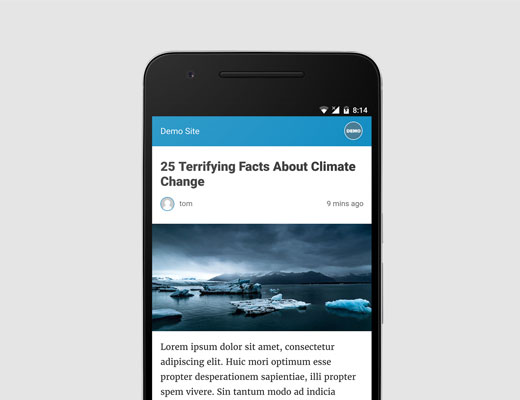
You can now visit any single post on your website and add /amp/ at the end of the URL. Like this:
This will show you a stripped down AMP version of the same post.
If you view the source code of the original post, you will find this line in the HTML:
<link rel="amphtml" href="http://example.com/2016/10/my-blog-post/amp/" />
This line tells search engines and other AMP consuming apps/services where to look for the AMP version of the page.
Troubleshooting:
If you see a 404 error when trying to view the amp version, then here is what you need to do.
Visit Settings » Permalinks page in your WordPress admin and click on the ‘Save Changes’ button. Remember, don’t change anything here, just press the save button. This will refresh your website’s permalink structure.
View Accelerated Mobile Pages in Google Search Console
Want to know how your Accelerated Mobile Pages are doing in Google Search? You can easily check this using the Google Search Console.
Log in to your Google Search Console dashboard and then click on Search Appearance » Accelerated Mobile Pages.
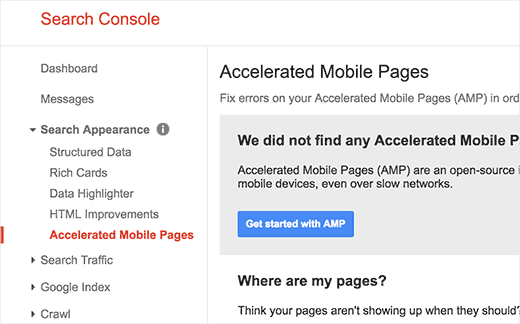
Don’t worry if you don’t see your AMP results right away. It may take a while for Google to index your Accelerated Mobile Pages and then show data in Search Console.
Extending and Customizing Your Accelerated Mobile Pages
The AMP plugin for WordPress comes with very limited customization options. However you can use some other WordPress plugins to add few more customizations.
If you are already using Yoast SEO, then you need to install and activate the Glue for Yoast SEO & AMP.
It is an add-on plugin for Yoast SEO and AMP plugins. Upon activation, you need to visit SEO » AMP page to configure plugin settings.
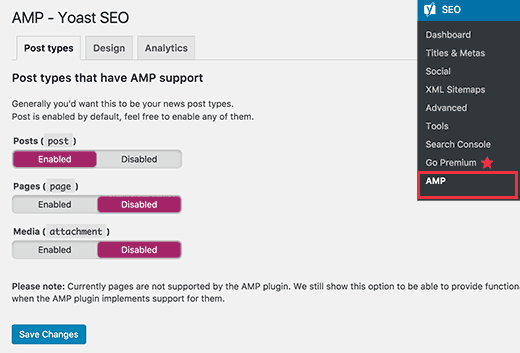
The plugin allows you to enable AMP support for other post types.
On the design tab, you can choose colors and design options. You can also upload a logo and a default header image which will be used when a post does not have its own featured image.
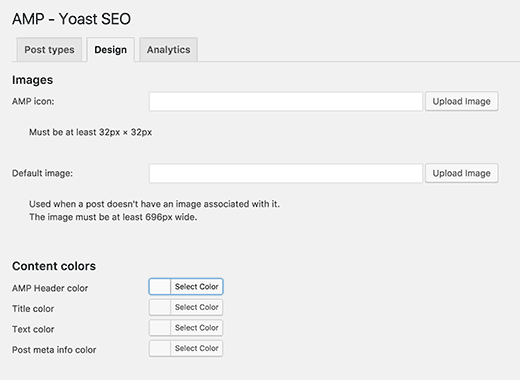
You can switch to the Analytics tab to add your Google Analytics ID.
Don’t forget to click on the save settings button to store your changes.
There are many more plugins which will allow you to add related posts, footer widgets, and even social media icons to your AMP pages.
However, you need to make sure to validate your AMP pages after you install any addon plugins.
We hope this article, helped you learn how to set up Accelerated Mobile Pages (AMP) on WordPress. You may also want to see our list of 19 actionable tips to drive traffic to your WordPress site.


